Assembling a Pullover, Part Two
Welcome to part two of our tutorials about assembling your Figheadh Fundamental Women's Pullover! Of course, this will work on any of the Fundamental pullovers, and for any other pullover knit flat.
Let's do this!
Once you have joined the front of your pullover to its back by seaming the shoulders, you can proceed to setting in your sleeves.
Lay your pieces out flat with plenty of light. Using stitch markers or clips, find the top center of your sleeve cap and attach it to the shoulder seam edge. Then clip the edges down at the underarm where you first bound off stitches for the sleeve cap shaping. Then attach clips halfway between those two points. Then attach more clips halfway between each of those points. This will all help you to keep everything aligned as it should be. If you really want to make sure the halves of your sleeve cap are equal, you can start at the top center and work out from there. I usually just start at the righthand edge and work all the way up to the shoulder and back down the other side.
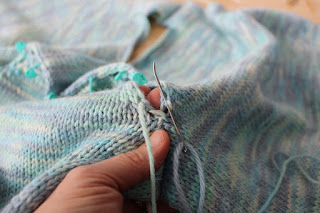
Let's try it underarm-to-underarm. Start at the right hand edge where you bound off stitches at the base of the armhole and work an invisible horizontal seam across all those bound off stitches. This is sort of akin to duplicate stitch in that you are creating stitches that mimic the knit stitch between the two edges. Keep it loose for a few stitches as above.
Once you have worked a few stitches, tighten them up. Then work across the remaining bound off stitches and tighten those.
Once you have the bound off section seamed, you can transition to mattress stitch to work up the side of the sleeve cap until you reach the next set of bound off stitches at the top.
Working back and forth for a few stitches loosely...
...and then tightening every few stitches will help keep the edges visible.
Here is my video to show mattress stitch in action.
When you come to the bound off stitches at the top of the sleeve cap, revert to invisible horizontal seaming again. As before, work a few stitches at a time before tightening.
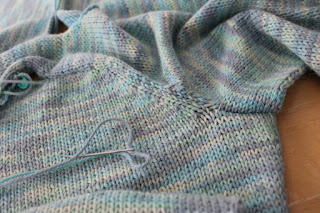
And you have the first half of your sleeve cap seamed! Yea!
Now work back down the other half the same way until you reach the bound off stitches at the other side, where you will work the invisible horizontal seam again.
You made it! Now sit back and admire your work for a few minutes.
I won't lie to you and tell you that this is easy, but once you get some practice with this technique, you'll feel better about it all.
And it's really fun to work this on a striped sweater. The stripes keep you in line!
Now it's time to seam the sides and sleeves. Go and rest a few minutes, and then read on for my last post in this series. Thanks for reading!
Yarn details: First sweater was knit with Cascade Lana D-Oro and the striped one is with Cascade 220.


Comments