Swatching for Glentrekker
Let's talk about some options when you swatch for your Glentrekker Cardigan.
First, allow me address yarn choice. This all goes for any cabled knitting project you may attempt.

These are the problem-child yarns when cable knitting. Tweedy, semi-solid, fuzzy-wuzzy yarns may not give you the best result. Why? Because all of these otherwise appealing qualities can hide the cables you worked so hard to perfect.

These are better for cabling, obviously. You can see here that the cables are crisper and more well-defined. These are all plied wool and wool blend yarns, some with silk. Make a careful yarn choice to knit your Glentrekker and you will be happier with the results.
As for what shape your swatch will take, here are the options, according to two variables: how much time you have and how much yarn you have.
Option One
You have a little extra time and you have an extra skein or two of yarn.

Make a hat! The pattern includes two hat options based on Elizabeth Zimmermann's advice that a hat makes a good swatch. It's true! By the time you've made a hat with the stitch patterns involved in the cardigan, you will not only be more familiar with them, but you will be able to accurately assess your gauge based on how you will actually knit the cardigan. The hat on the left, the Glentrekker Toque, is made by knitting a flat swatch that includes all of the cable patterns in the cardigan (because the cardigan is knit flat), blocking the flat piece, and measuring gauge before going on to seam the piece and knit the crown in the round.
The hat on the right is the Glentrekker Slouch Hat and it helps you determine your gauge for the cardigan's sleeve, which is knit in the round. The sleeves of the cardigan and the body of the cardigan have different gauges because of being knit structurally different and because the sleeve has more Stockinette Stitch.
Notice that both these hats are nicely blocked. The Slouch was blocked on a head form and the Toque was blocked on a round bowl with straight sides.Once you work up a hat for a swatch, you not only know your gauge, but you have a hat to boot! It's always good to have a new hat.
Option Two
You have a bit more time, but not much extra yarn.
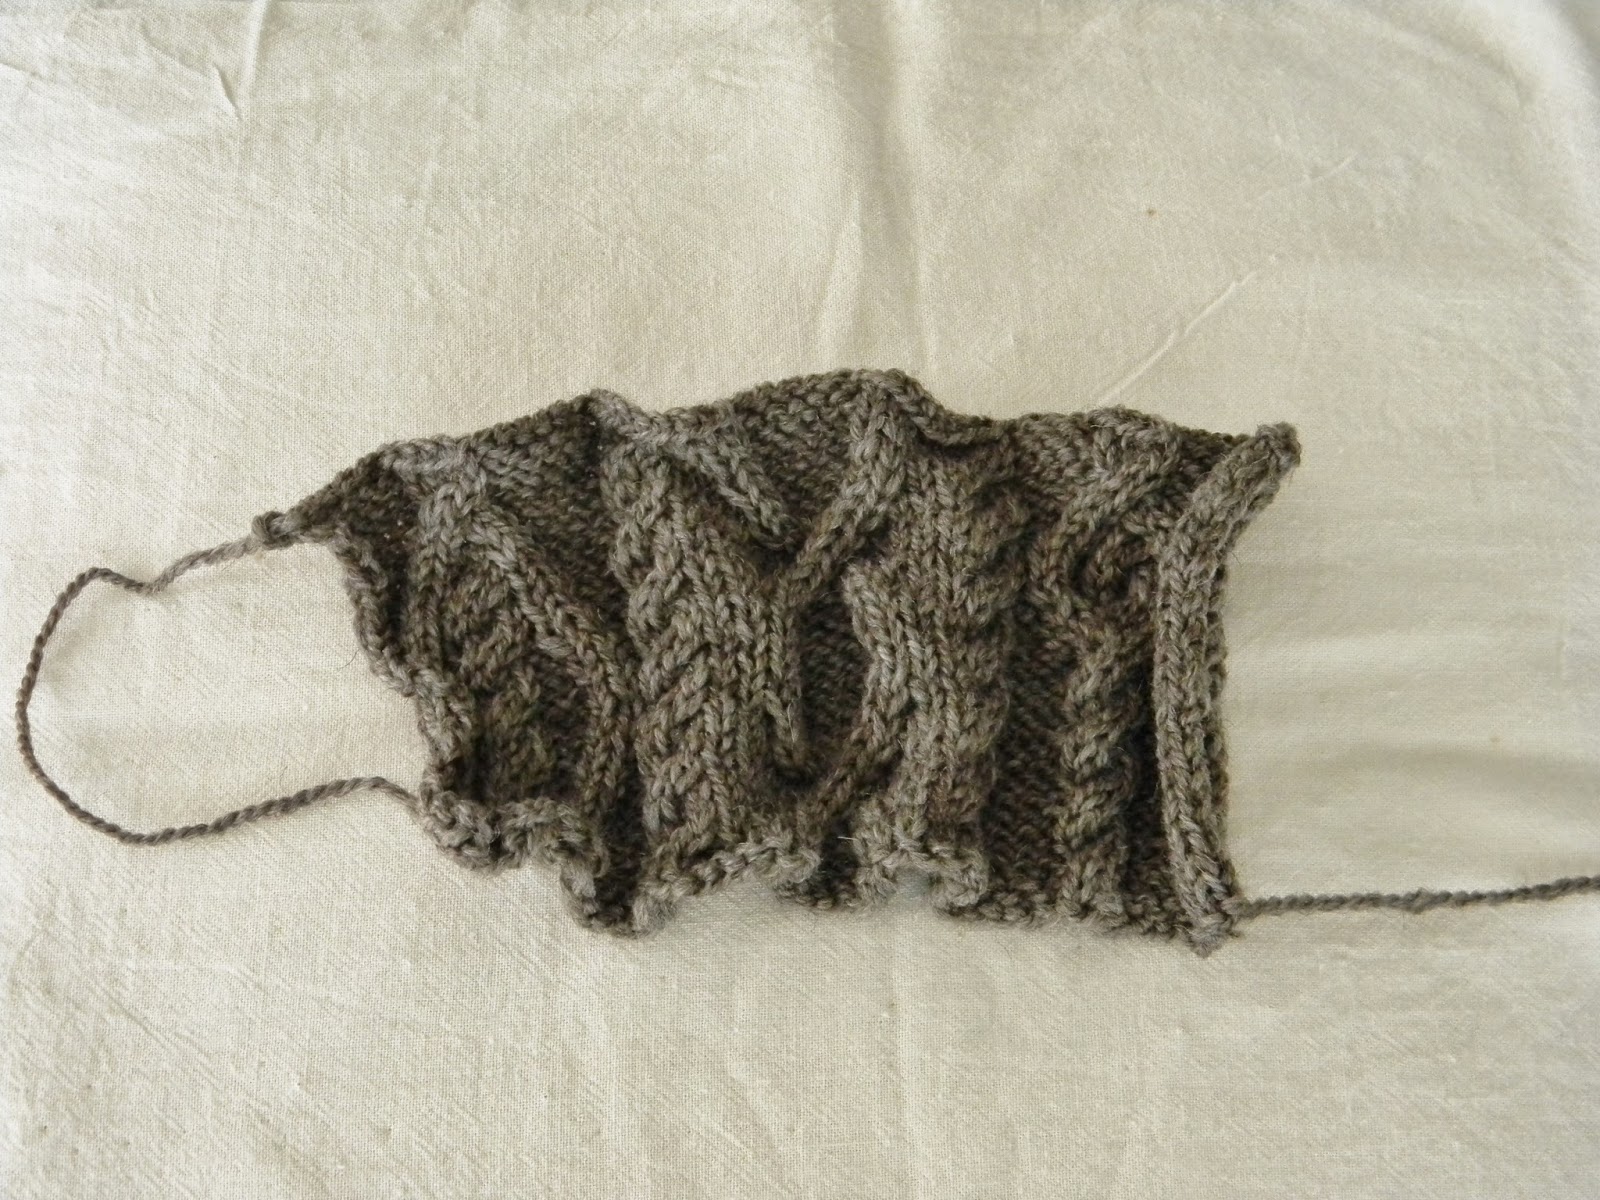
This crumpled thing is the "RF & Side" section of the size I am knitting, size 35.5". By knitting this little section, I was able to find my cardigan body gauge without spending as much time as it would take to make a hat. Also, I can always rip this little thing and join him in later when I'm making the actual cardigan. I suggest knitting up one of the smaller-size "RF & Side" sections--you don't really need more than the 57 or so stitches and one repeat of the 28-row pattern to determine gauge.
But, wait, we have to block it. We'll never figure gauge from that crumpled thing.

I stepped outside my comfort zone a little and steamed this swatch for speed purposes. I usually give the swatch a total immersion bath and then pin it out and allow it to dry naturally. However, I want to cast on today, so I wanted to hurry it up. I still prefer the bath treatment, but this works for now.
Option Three
You have no extra yarn and no extra time.

Start a sleeve! The pattern gives you gauge for each, cardigan body and cardigan sleeve, so you can check to see if you get gauge on your sleeve as you knit it. You have to knit two of them anyway, so no time lost! You can see that I worked the cuff and then one repeat of the 28-round pattern, starting my shaping as I worked. Then I transferred the stitches to a length of waste yarn so I could steam the piece and pin it out a bit. I can also slip it on and give it a try for fit. It fits great. Now I'll steam and pin it out.

I'll let these two rest while I get some lunch, and then it's cast on time, baby!
Just a little note, especially for our Bare Naked Wool KALers--I am making the Glentrekker this time with Kent DK to try it out, and I had to use one size smaller needle than what I used with their Breakfast Blend DK. I think it is because the Romney element gives the Kent more of a halo and it only has two plies, whereas the BB DK has three plies and neater surface. I love them both!
Next time, I'll be posting some tips to help you knit the cables more efficiently. See you then!

Comments